Few days ago, I was requested by a friend to do a large sign for college. I've never done something like that before, but I accepted the challenge!
Here's the behind the scenes of the process of how I structured everything to get that formal 'printed' look!

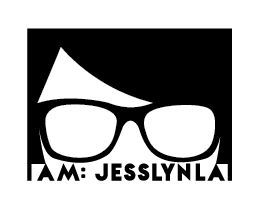
*Doing the final touches of the painting at my workspace.

The materials given to me were a big canvas and red and white acrylic paints.

I did the design digitally and then proceeded right after my friend approved the design. I decided to print and cut the letters as I didn't have much time to sketch them by hand.

To get the right positioning and spacing of the cut pieces on the canvas, I measured the top, bottom, and sides and used a string to create my guide. Then I attached each letter until it looked good to go.

I grabbed the nearest old container around me and poured the thick acrylic in. Used a flat sponge I previously bought knowing I would make use of it one day - this is the day!

Using the cut-outs in replacement of pencil sketching, I used it as a guideline and roughly painted over the letters, touching up the excess paint later.

This is where I fill the white area with the thick white acrylic. Then, touching up with red and white paint going back and forth for about 4 times before the lines look much more crisp and straight. It is the most tedious part of the process, as every minor stroke matters.

Joy! After 5+ hours, tired but satisfied. :)